The MorphymailStart up wizard is designed to make the complicated campaign creation and sending procedure as easy as possible for the user. By splitting up the task into a sequence of steps Morphymail have effectively simplified the email marketing task.
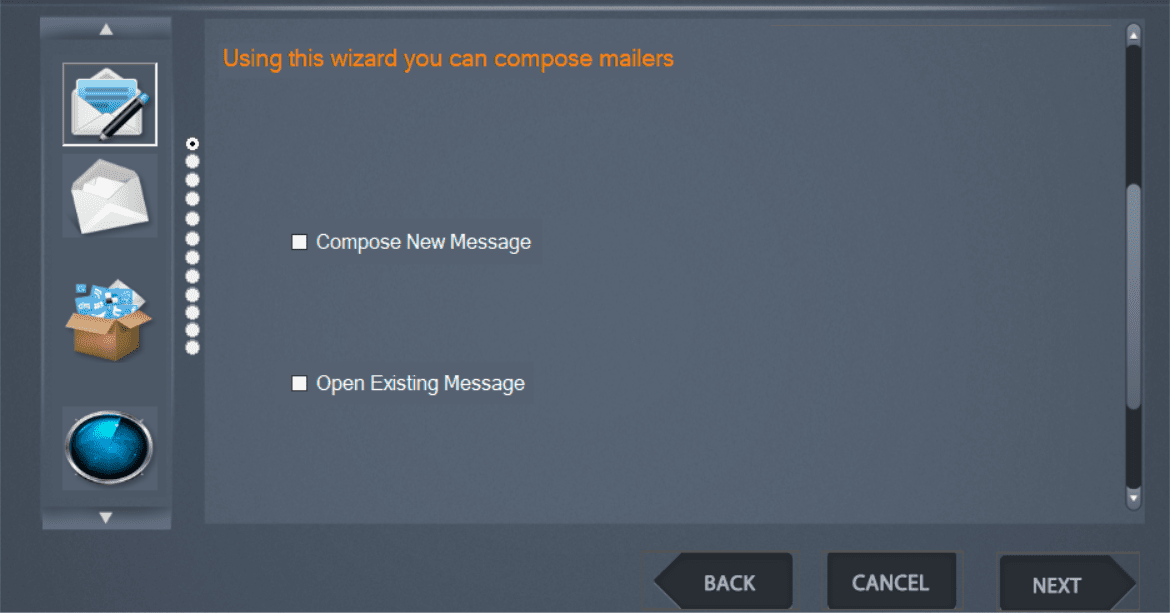
Click on the option in the Navigation panel, the start up wizard appears as below.
Use the Back button to go back to previous steps in the wizard.
Click Cancel to exit the wizard at any time and to go to the Home window of the software.
Step1 : In the first window the user will get 2 options
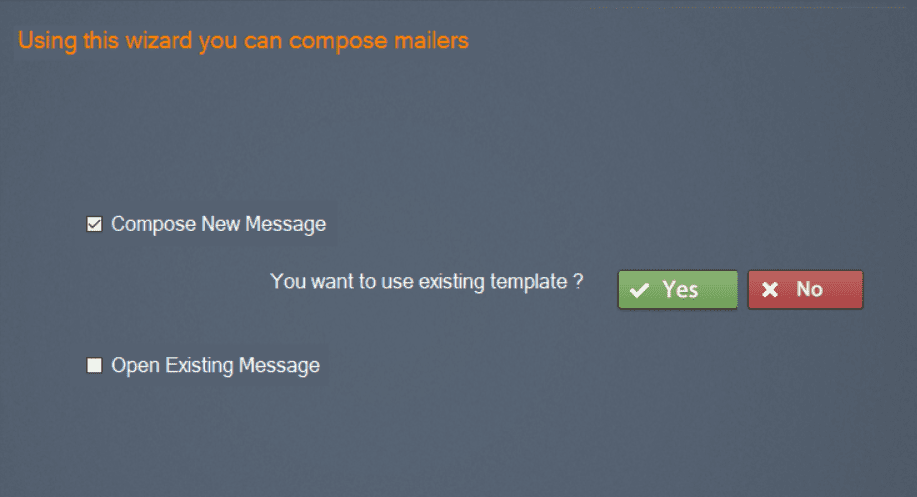
Compose New message :- Check this option if the user wants to edit and create own email message. Here the user can either start from scratch or can modify an existing template file stored locally. When you check this option a message will appear
“You want to use an existing template?”
Click Yes to open a local template file to start with. On clicking Yes an open file dialog box appears. Choose your template file in html, eml, doc or txt format and click Open. Click the NEXT button and go to the message editor.
Click No to go to the next wizard window, a blank message editor window appears and start composing your mail from scratch.
Open Existing Message : choose this option if you already have your email meage saved locally. When You check this option an open file dialog box appears. Choose your email message file in html, eml, doc or txt format and click Open. Click the NEXT button and go to the message editor.
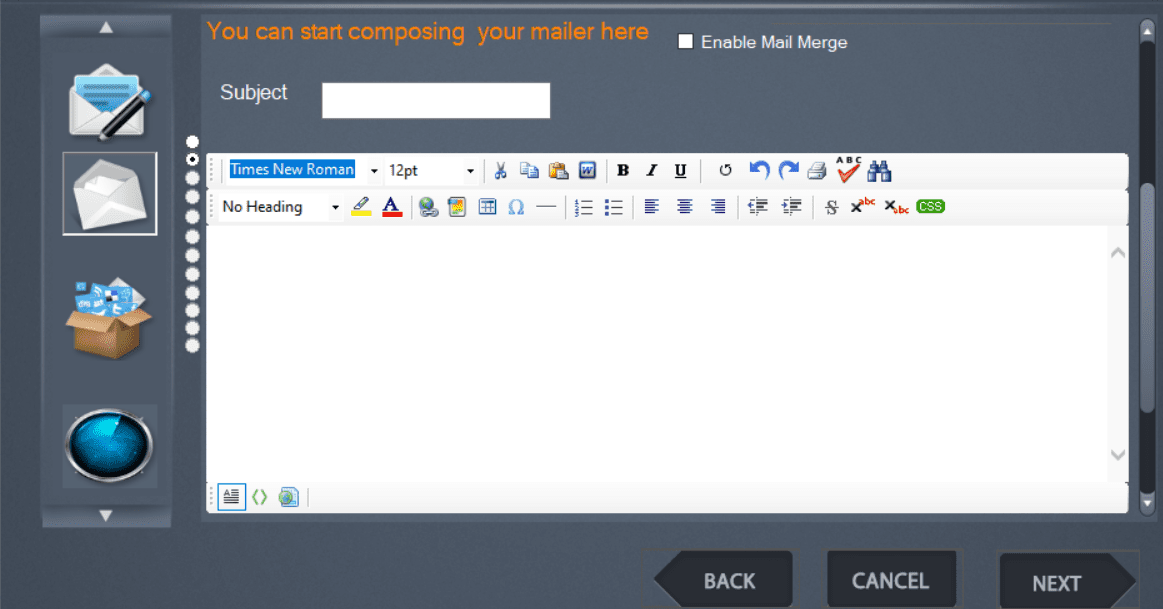
Step2 : Second window in the wizard, Compose Mailer window, allows the user to edit the message content with WYSIWYG Editor. In this window the user can insert personalization fields in the message.
Subject :- Enter the subject of your email message.
WYSIWYG Editor :- WYSIWYG stands for the What You See Is What You Get editor. It is a tool that helps users format and structure email. The main advantages of a WYSIWYG email editor are that you can do it yourself with ease, you can experiment with colors and layouts. Thus users can design beautiful email newsletters even without any knowledge of HTML. Defining the Icons in Editor below
ICON
DESCRIPTION and USE
Font Type
Font size
Cuts the selected content to the clipboard.
Copies the selected content to the clipboard.
Pastes the content currently stored on the clipboard.
Pastes content copied from a Microsoft Word document.
Bold the selected text.
Italicise the selected text.
Underline the selected text.
Remove all formatting from the text.
Undo the last change.
Redo the change that the “Undo” button undid.
Prints the content
Spell checking
Locate a string of text within the editor.
Select the style to be applied to your selection.
Highlight a selected text with chosen colour
Select the colour for your text
Insert or edit a link.
Insert an image.
Insert a table.
Insert symbols.
Insert a horizontal line.
Create a numbered list.
Create a bullet point list.
Align the select paragraph to the left.
Align the select paragraph to the center.
Align the select paragraph to the right.
Decrease the indentation applied to the selected paragraph.
Increase the indentation applied to the selected paragraph.
Strikethrough the selected text.
Lower the selected text.
Raise the selected text.
Change the style of content with style builder
The WYSIWYG Editor allows 3 views
WYSIWYG Design Mode: Default WYSIWYG Editor
HTML Edit Mode : View/Edit HTML source code of the page
Preview Mode : This will show you the content inserted so far, as it appears in the browser.
Enable Mail Merge : To send customized messages (as opposed to generalized messages), in the message subject line and body (both in the HTML section and in the plain text section) you can insert mail merge. Each mail merge is actually a field reference: when the message is sent, the mail merge is replaced by a value read from the recipient’s text in the specified field.
For instance, if we include a [Name] and [LastName] mail merge , by selecting from the Body mail merge dropdown in the message body like:
Dear [Name] [LastName] ,
the recipient will receive a customized message like (example):
Dear Allison Taylor ,
It is also possible to use fixed mail merge (field name independent mail merge) that are referred to as Field1, Field2 and so on up to Field6.
If you want personalisation check Enable Mail Mergeoption, you will get options for inserting mail merge in both subject and body separately as shown
To insert mail merge in subject line
Place the cursor in the Subject line where you want to insert the mail merge
Form Subject MailMerge dropdown and select the mail merge field you want to insert.
To insert mail merge in message body
Place the cursor in the message body where you want to insert the mail merge
From Body MailMerge dropdown and select the mail merge field you want to insert.
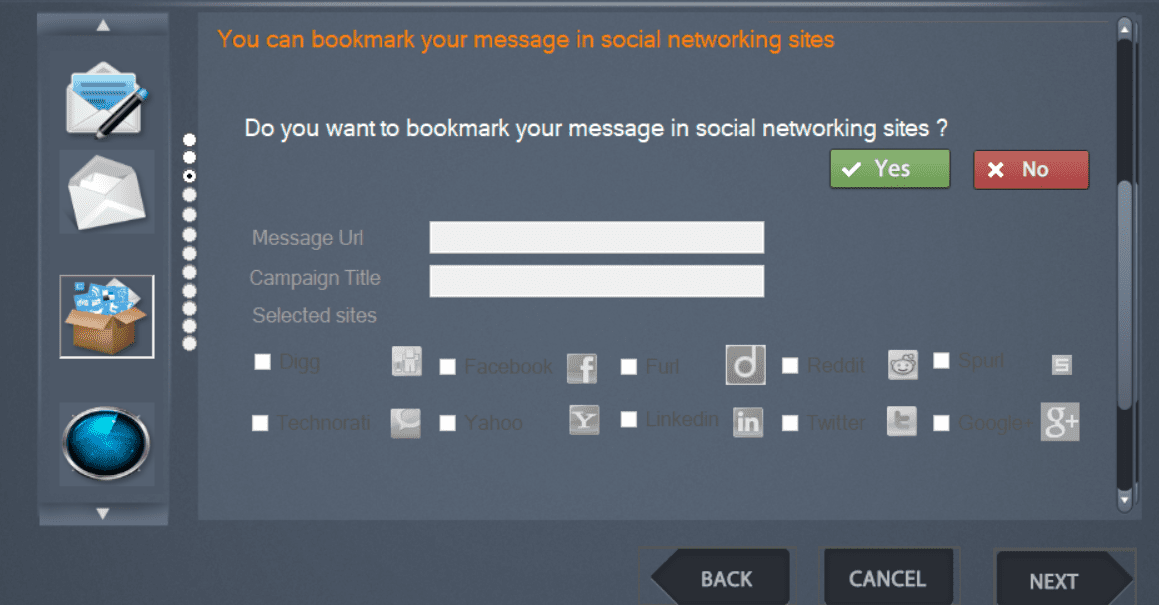
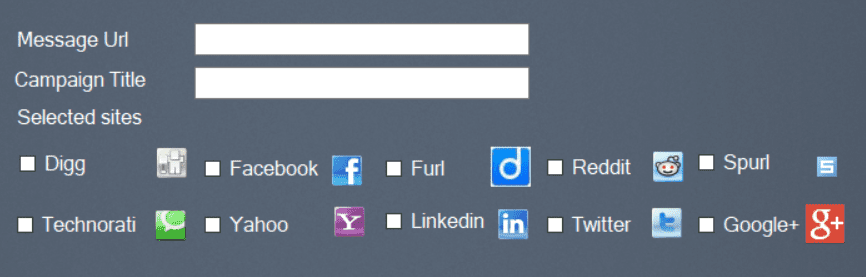
Step3 : Third window in the wizard, Social Bookmarking window, allows the user to insert social bookmarking sites in the mail body. In this social bookmarking option, users save links to web pages that they want to share. When a recipient of your campaign clicks on the social bookmarking icon(like Facebook) in the received email, the saved link will be shared in the user’s corresponding social bookmarking site account (like user’s Facebook account). Posting interesting content that appeals to a larger audience will lead to awareness of your website and increase website traffic.
To add social bookmarking links in your email,
Click YES for “Do you want to bookmark your message in social bookmarking sites ? “ .
Message URL :-Enter the URL to the message or content you want to share in the social bookmarking site here.
Campaign Title :- Enter a title for the content you are sharing here.
Selected Sites :- Check the boxes corresponding to the social bookmarking sites in which you want to share your specified content.
Click NEXT button to insert the above details into the email body.
Click No for “Do you want to bookmark your message in social bookmarking sites ? “ to skip adding the social bookmarking step and to go to the next step in wizard.
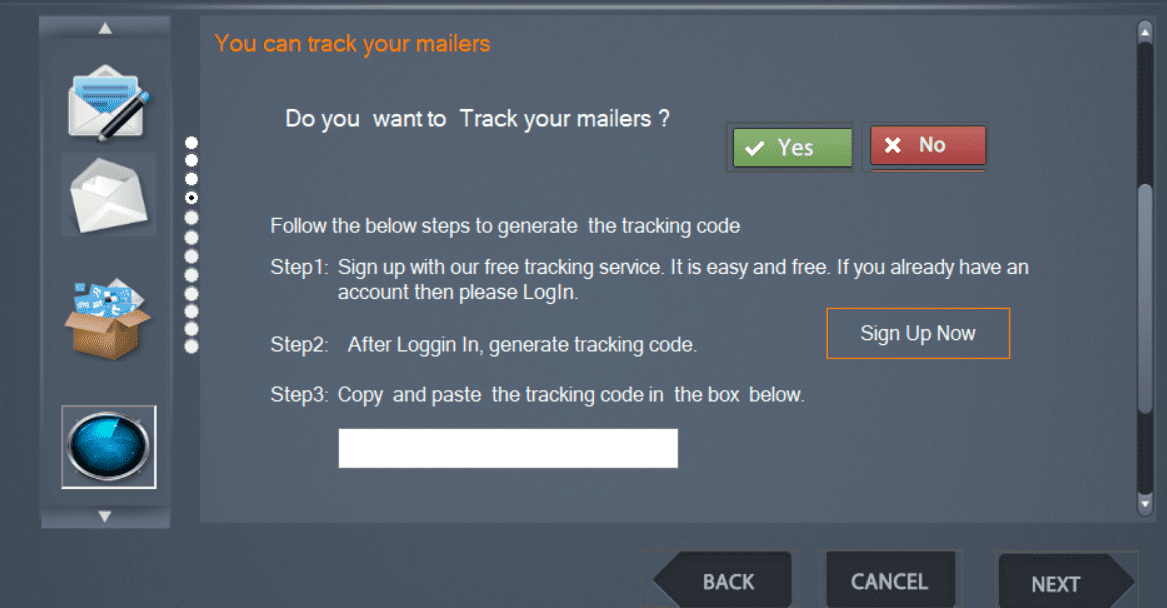
Step4 : The fourth window in the wizard, Tracking mail window, is used to insert Tracking code in your email.
http://www.trackemaildelivery.com is an online service which allows you to track your campaigns. It gives you details of how many people opened your newsletter, how many of them actually clicked on links, and the geo location of your recipients. It displays collected data using detailed charts. In order to start tracking your mailing, just insert tracking code in the message.
Steps to insert tracking code in your email,
Click YES in “Do you want to track your mailers ?”
Connect to the Internet (if you are not already connected) and click on the
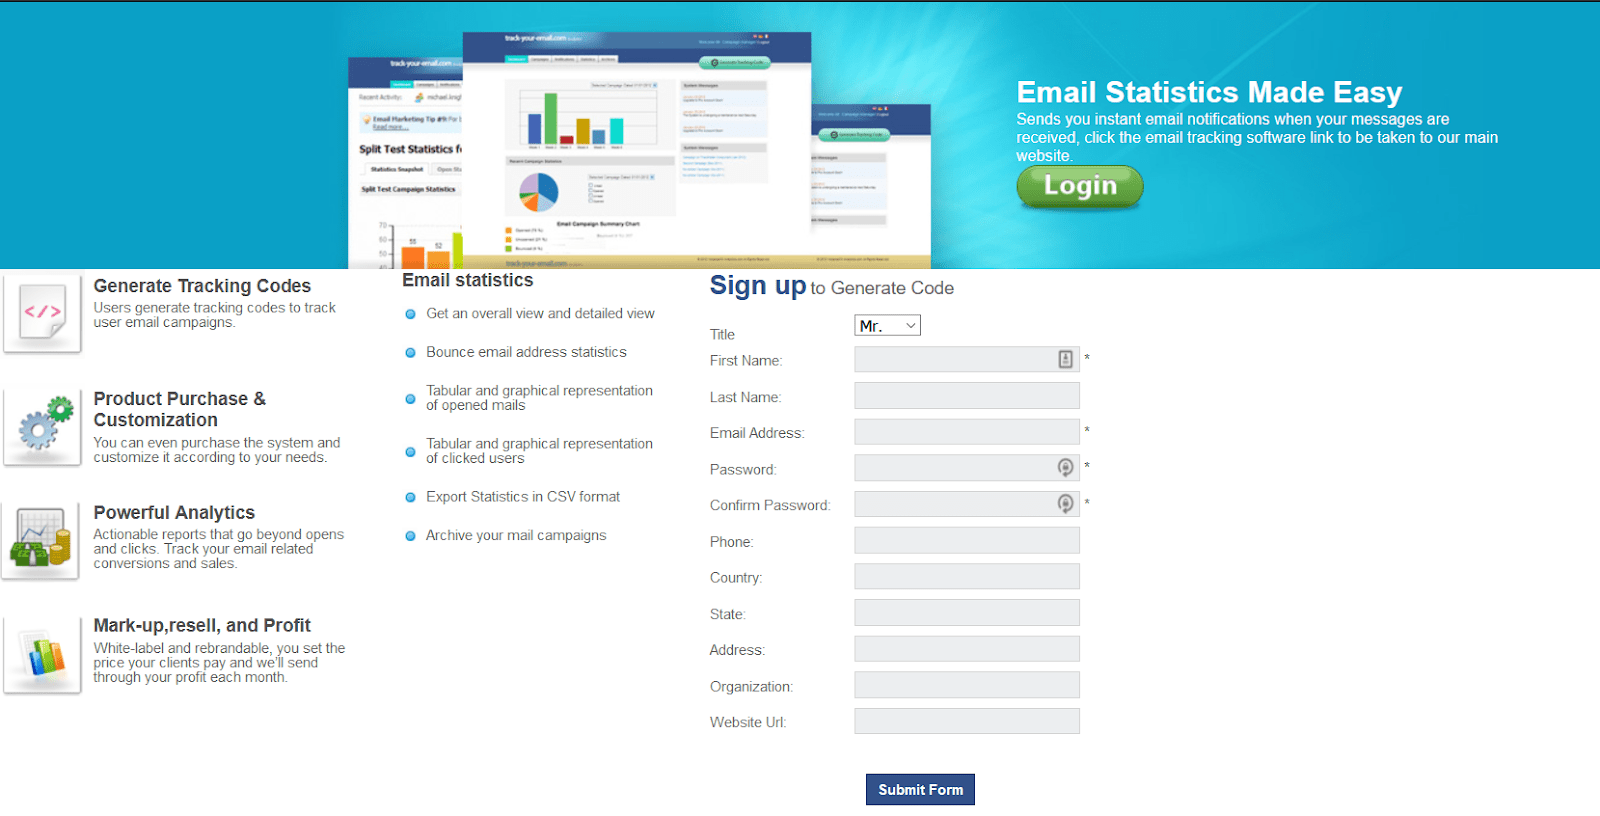
Sign Up now button. http://www.trackemaildelivery.com appears in the browser.
Sign up for a new account by filling the form and clicking Submit Form button
Or Login , if you already have an account.
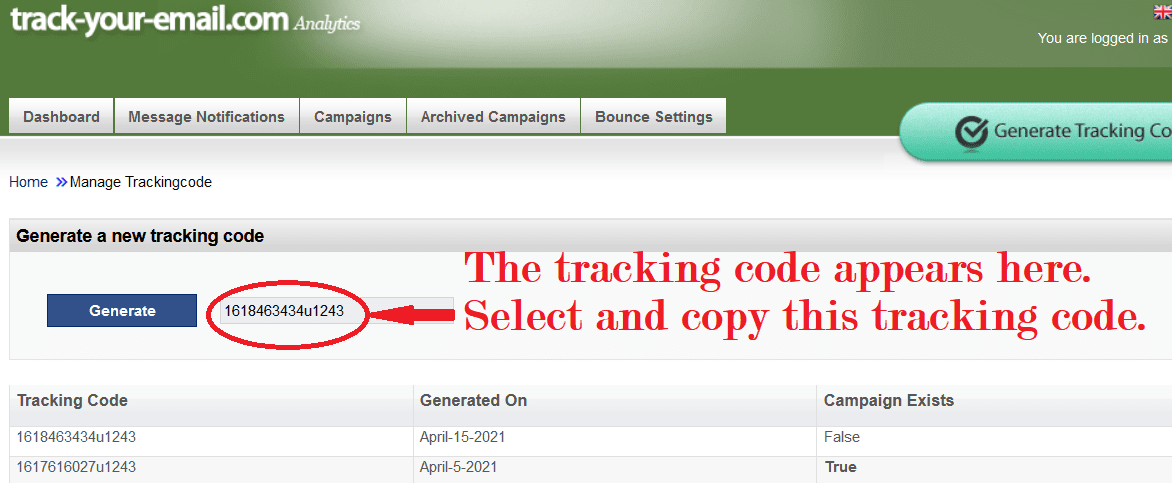
Click on Generate Tracking code button in the tracking site. Click Generate and Copy the tracking code.
In the textbox ofStep3of Tracking mail window in Morphymail wizard, paste the copied code
Click NEXT to insert the tracking code in the mail and to go to the next step in wizard.
All links in the message will be automatically updated so that they include the needed Tracking code and redirection system; a “tracking image” is also added to the message.
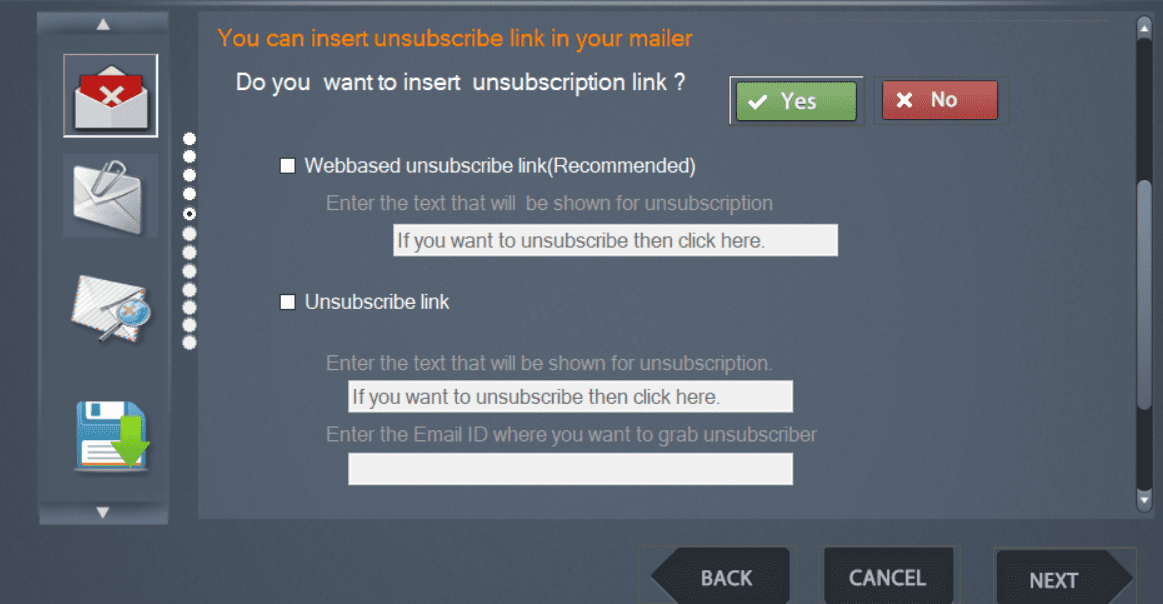
Step5 : The fifth window is the Unsubscription window of the wizard, which allows you to insert unsubscription links to your newsletters. Unsubscription links are important for maintaining healthy email lists. Morphymail allows 2 types of unsubscription through your email: Web based unsubscription and Pop3 based unsubscription.
To insert unsubscription link in your email,
Click YES in the “Do you want to insert an unsubscription link ?”.
Check Web based unsubscriptionlink option, if you want to insert web based unsubscription, otherwise check Unsubscribe link option and enter the email id used for unsubscription.
Which email address should I use for this?
It is advisable to dedicate a different subscribe/unsubscribe e-mail address for subscription management, that is, an address that is not used for any standard email sending and receiving. This will minimize the risk of receiving spam (that will be ignored during the downloading process of subscription management) and will make it easy to manage the lists. This makes message downloading faster and, most of all, the account space will be preserved. Some services have a limit on the total amount of space that the messages can occupy, and if the given space gets filled, no more messages are delivered.
The email recipients not interested in a newsletters will click on the unsubscribe link, then a message with “Unsubscribe” in the subject line is sent to this email address.
Enter the text that you want to appear for an unsubscribe link in your email.
Click NEXT to insert the unsubscribe link in the email and to go to the next step of the wizard.
Using the Manage subscriptions option in Morphymail user can unsubscribe unsubscribed email recipients from the list.
Click No for “Do you want to insert an unsubscription link ? “ to skip adding the unsubscription link step and to go to the next step in wizard.
Step6 : The sixth window of the wizard, Attachment window, allows you to attach file(s) to your email newsletter.
Steps to add attachment(s) to your email,
Click YES in “Do you want to attach files to your mailer?”
Click Browse and choose the file you want to attach. Repeat this step for adding multiple files as attachment. If you want to remove an added file : click on the file name from the list and click Delete button.
You can compress your file(s) into a single zip file and attach this zip file to your email. For this check Compress attachment into a single file check box.
Click NEXT to complete the attachment process and to go to the next window in the wizard.
Click No for “Do you want to attach files to your mailer? “ to skip adding the attachment and to go to the next step in wizard.
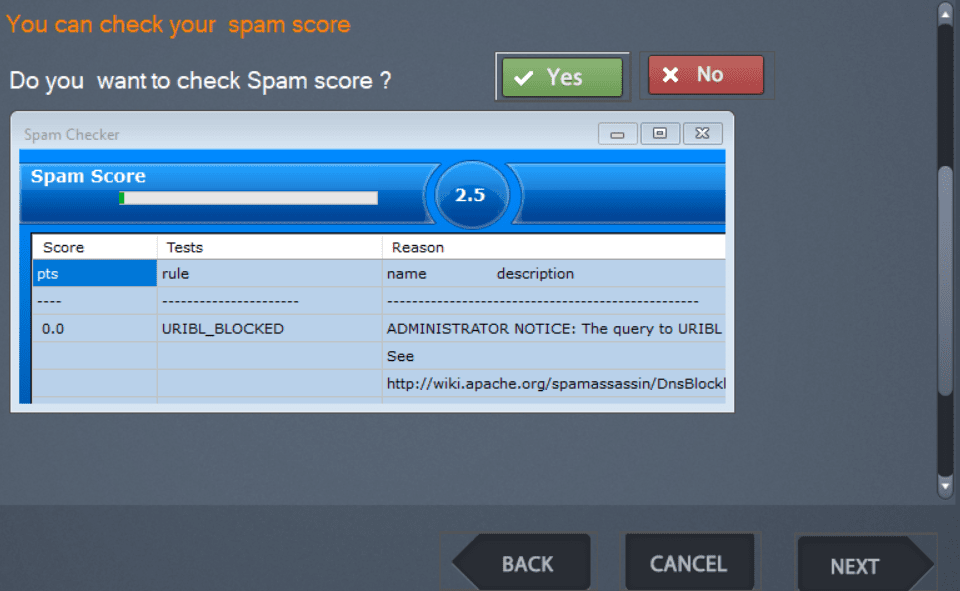
Step7 : The seventh window in wizard, check spam window, allows you to check your spam score.
Spam filters perform regular tests on mail messages to determine if they are spam or not. Most of them work on a spam score system, so that the occurrence of just one “spam phrase” probably will not trigger rejection. But if your spam score is too high, your message will get blocked, even if it is well designed and formatted.
Before sending your newsletters, always remember to perform a spam check. This tool will tell you what your spam score is, based on the SpamAssassin rules. If you get a big score (ex. more than 5) then it is better that you adjust your newsletter before sending. Always save deliverability by avoiding all those “spam” words.
Steps to check Spamscore of the composed email,
Click YES in “Do you want to check Spam Score” ?
If your Spam score >=5 , check the spam checker resultand avoid the spam triggers by adjusting the content of the newsletter
Repeat the above two steps until you get a score<5.
Click NEXT to goto next window in the wizard.
Click No Or NEXT to goto the next wizard window without spam checking.
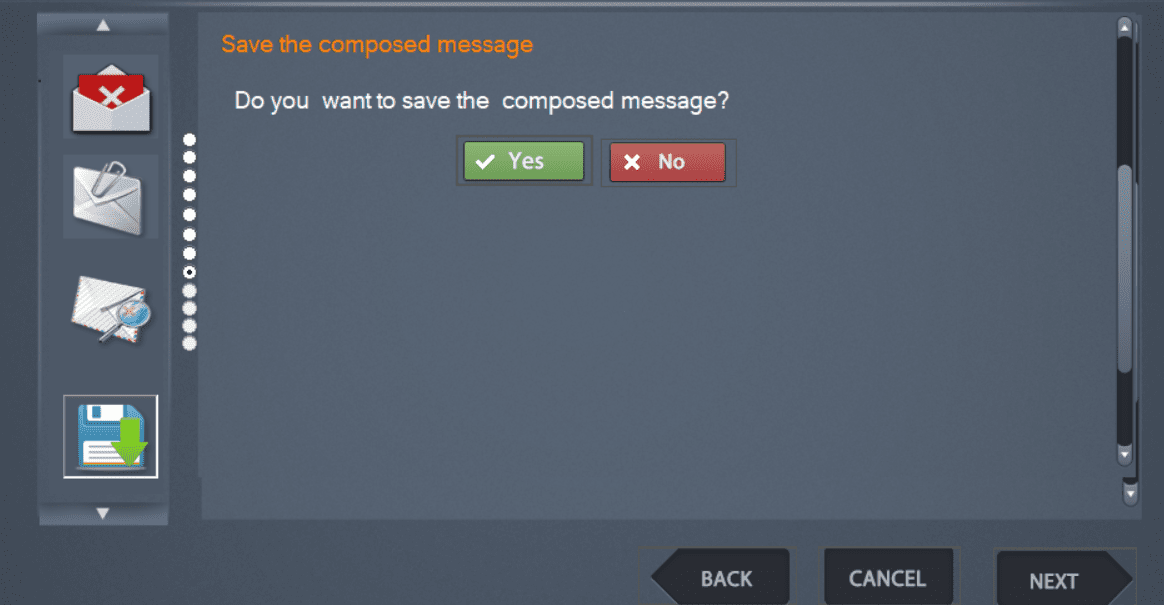
Step8 : The eighth window, Save mail window, in the wizard allows you to save the composed message in html, txt or eml format.
Steps to save your message,
Click YES for “Do you want to save the composed message ?”
The save dialog box appears: give a name to your file and select the format(txt, html, eml) in which you want to save the file.
Click Save Button
Click Next to go to the next window of wizard or click No for “Do you want to save the composed message ?”
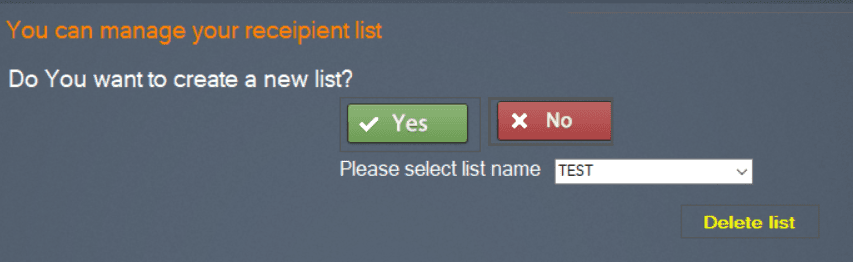
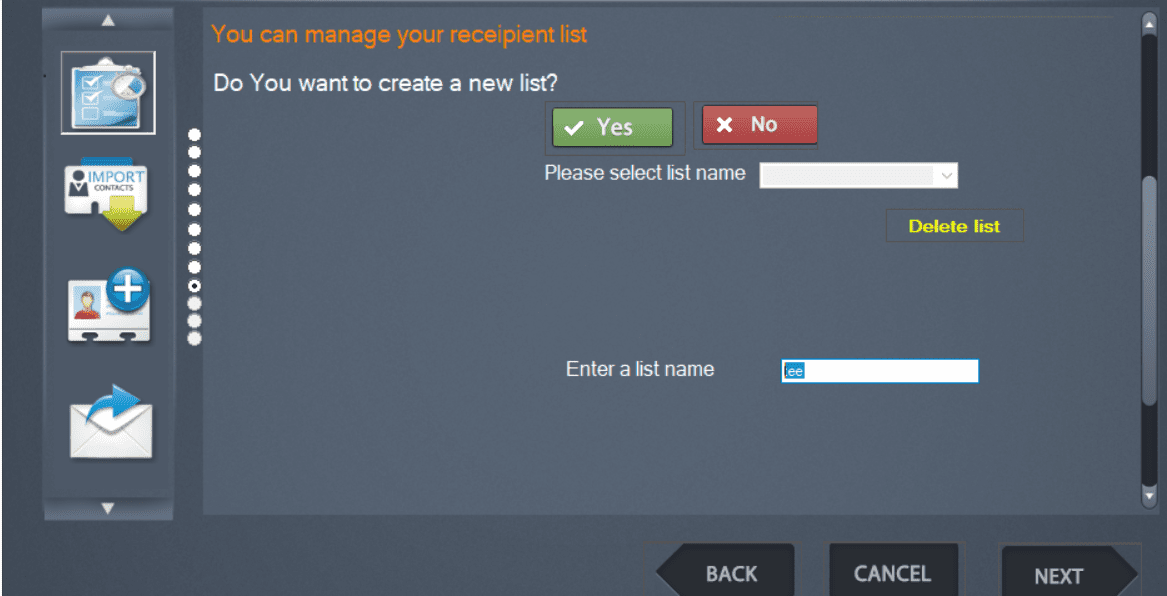
Step9 : The ninth window , the manage list window, of the wizard allows you to select the distribution list to which you are planning to send the campaign. This window allows you to create a new list or to delete an existing list.
Steps to select an existing list,
Click NO in “Do you want to create a new list ?”
Select the list, to which you want to send the mail, from the Please select list name dropdown.
Click NEXT button.
Steps to create a new list,
Click YES in “Do you want to create a new list ?”
Enter a name for your list in Enter a list name textbox
Click NEXT to go to the next window in the wizard(Import contacts window for populating your list with contacts).
Steps to delete an existing list,
Click NO in “Do you want to create a new list ?”
Select the list you want to delete from the Please select list name dropdown.
Click Delete button.
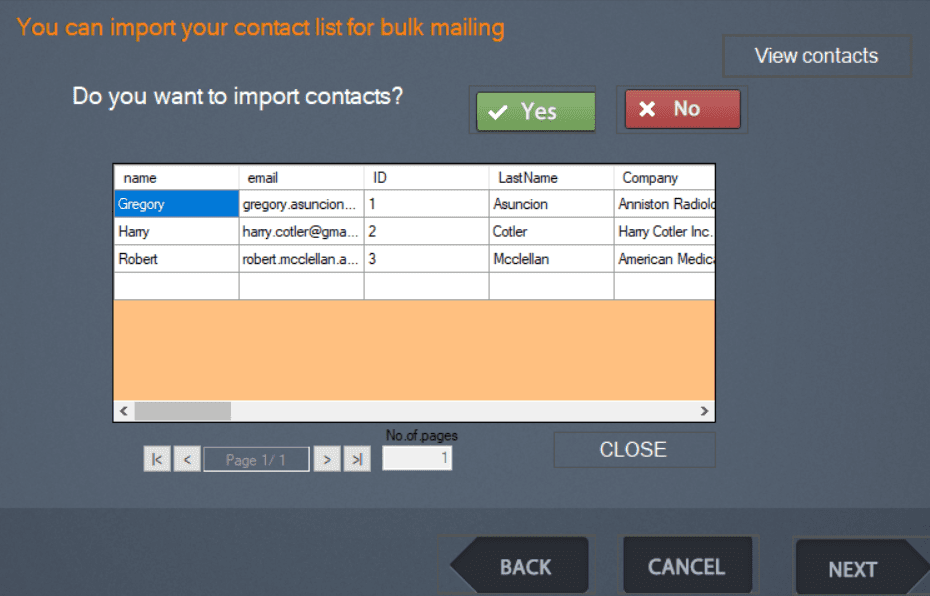
Step10 : The tenth window in the wizard, Import contacts window, allows you to view the contact list and to import contacts to the list from local files.
Steps to view your contact list,
Click the View contacts button, the contact list appears page wise in a grid.
The > button to go to the next page
The < button to go to the next page.
The >| button to go to the last page.
The |< button to go to the first page.
No.of pages text box shows the total number of pages.
Click the Close button to close the display grid.
Steps to import contacts to your contact list,
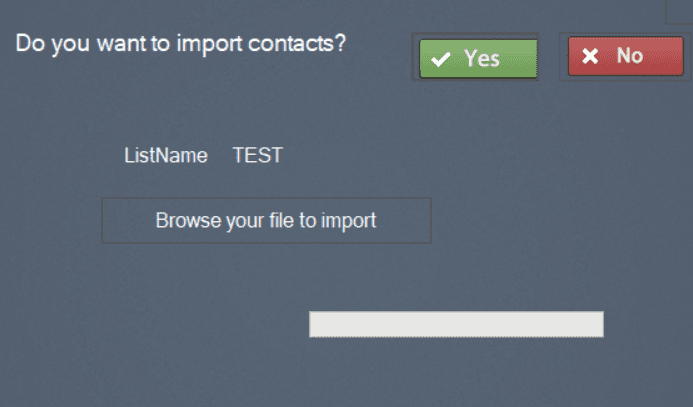
Click YES for “Do you want to import contacts ?”
Click on Browse your file to import button.
Choose the local file which contains your contacts.
Click open, all your email contacts in the file will be imported into the chosen list.
A message box appears showing the number of contacts imported. Select ok button in the message box.
Click on NEXT to go to the next window of the wizard.
Click option No for “Do you want to import contacts ?”, If you don’t want to import contacts to the chosen list.
The Manage lists option in the main window provides rich features for contact list management.
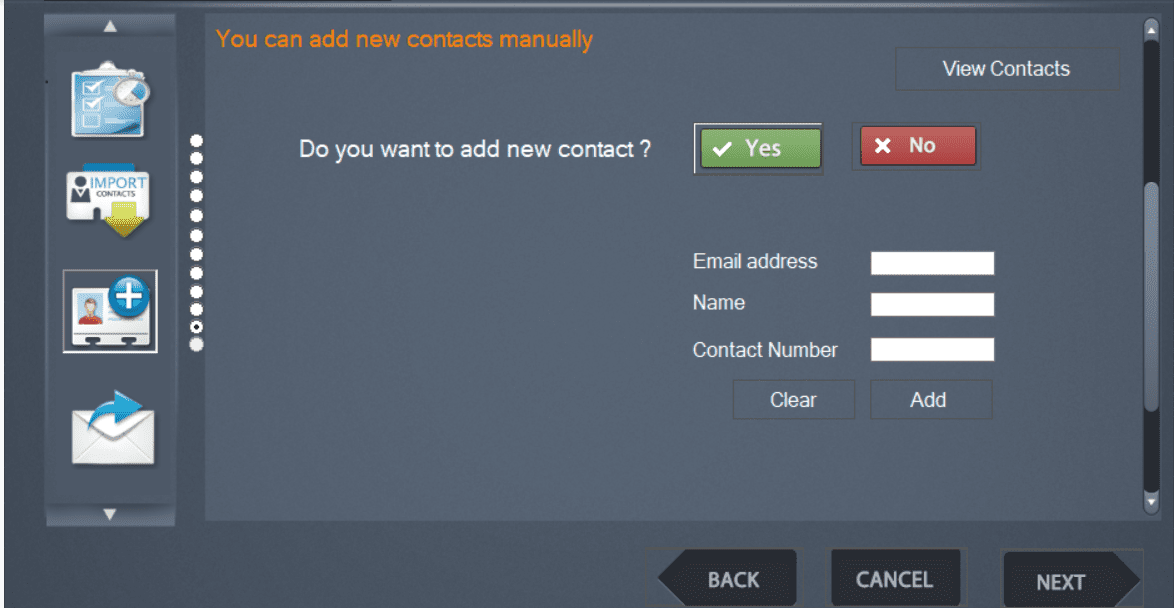
Step11 : The eleventh window in the wizard, Add New contacts window, allows you to view the contact list and to add contacts to the list from local one by one manually.
Steps to add contacts to your contact list,
Click YES for “Do you want to add new contact ?”
Enter Email address, Name, Contact number and click Add.(To remove the contents entered in the textboxes, click the Clear button. To add multiple contacts, click the Clear button after adding each contact).
Click on Next button to go to the next window of the wizard.
Steps to view your contact list,
Click View contacts button, the contact list appears page wise in a grid.
The > button to go to the next page
The < button to go to the next page.
The >| button to go to the last page.
The |< button to go to the first page.
No.of pages text box shows the total number of pages.
Click on the Close button to close the display grid
Click No for “Do you want to add new contact ?”, If you don’t want to import contacts to the chosen list.
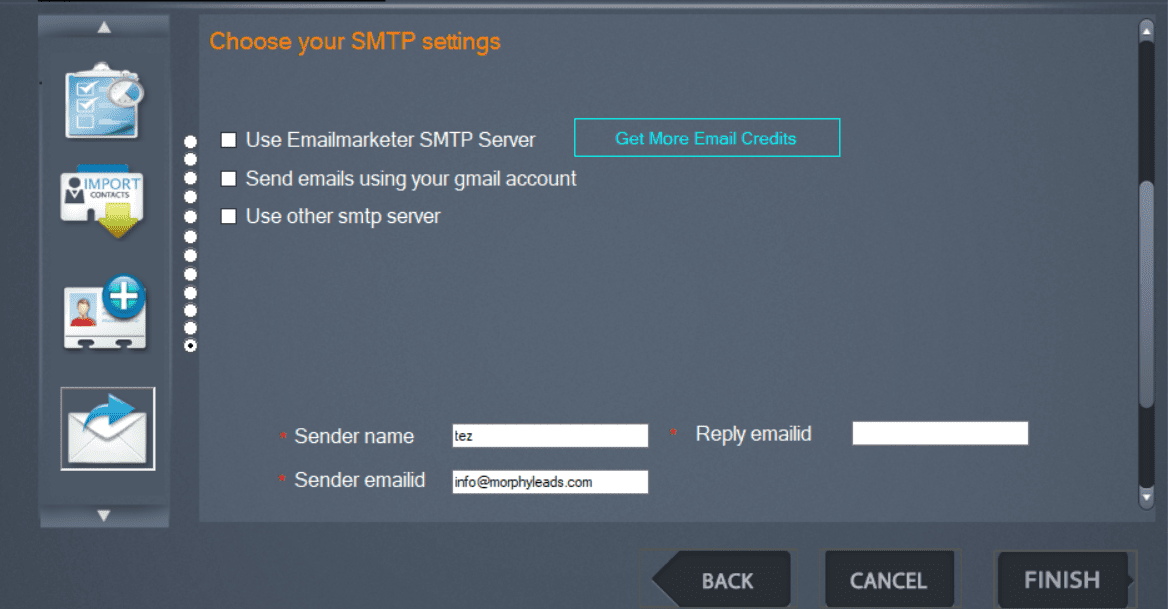
Step12 : The 12th window of the wizard, the Send window, Allows you to send the campaign.
There are 3 options to specify the SMTP settings for your send operation.
Steps to sent your campaign,
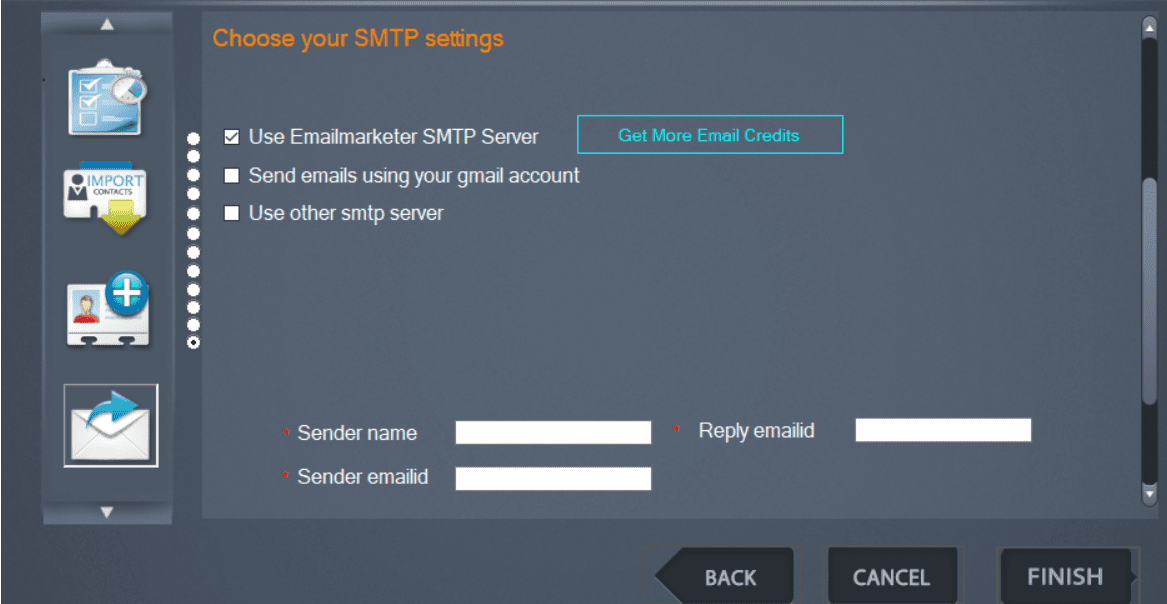
Select the mode of sending. Three Send modes are available:Use default SMTP server, Send emails using your gmail account and Use other SMTP server.
Use default SMTP server:- This is the first option in the send window. It allows the user to send using the inbuilt smtp server of the software.The software’s inbuilt SMTP server provides 100 free credits for each user.
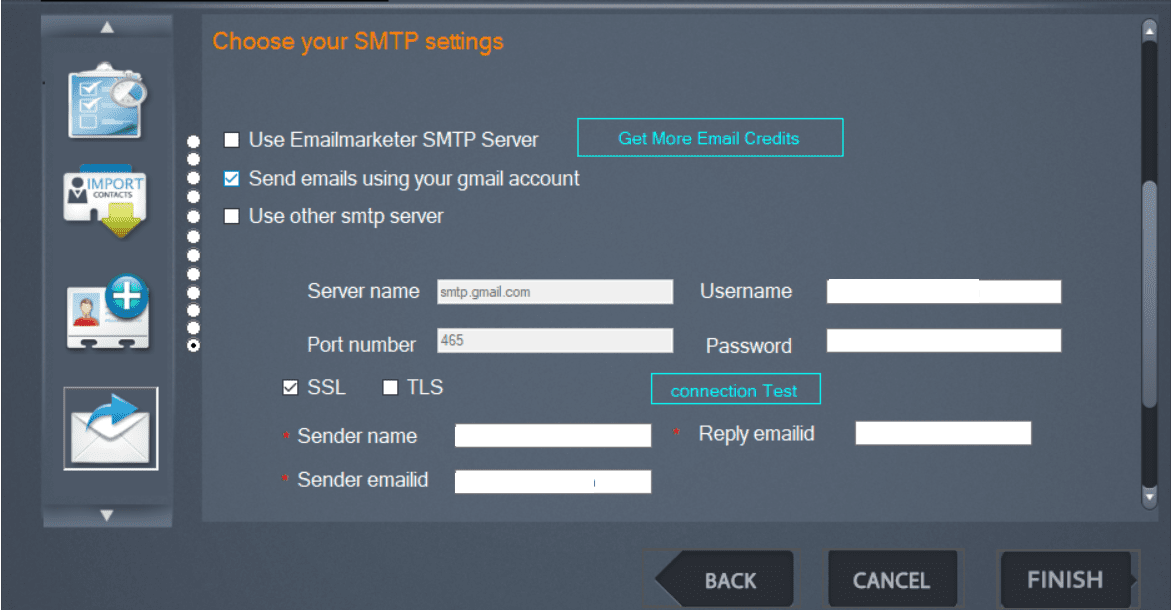
Send emails using your gmail account:-This option allows users to send messages using their own free gmail account. Inorder to convert an ordinary gmail account to smtp so that it can be used with the software follow the steps below.
STEP 1: Enable access to less secure apps in your gmail account. Sign in to your gmail account. Then Click on https://www.google.com/settings/security/lesssecureapps and enable access to less secure apps. Make sure the Gmail Account You See on TOP RIGHT CORNER is the same gmail account you want to use in the software.
STEP 2: Unlock Captcha. Sign in to your gmail account, Goto the url http://www.google.com/accounts/DisplayUnlockCaptcha and Unlock Captcha. Make sure the Gmail Account You See on TOP RIGHT CORNER is the same gmail account you want to use in the software.CAUTION: IF YOU SEND MORE THAN 500 EMAILS IN A DAY FROM A SINGLE GMAIL ACCOUNT, YOUR ACCOUNT WILL GET BLOCKED FOR 24 HOURS. BLOCK WILL BE REMOVED AUTOMATICALLY AFTER 24 HOURS AND YOU WILL BE ABLE TO CONTINUE EMAIL SENDING.
Use other SMTP server :-This option allows the user to send emails using any third party SMTP server. It is necessary to specify the name of the SMTP server, the port where smtp service is offered (if it’s not specified, default port 25 will be used), select Authentication required in case a user authentication is required, and specify Username and Password. The SSL checkbox enables SSL communication, which may be needed by some SMTP servers .
Depending on the send mode user has selected the details to be specified varies as below.
If first send mode is selected, The user has to specify the message sender in the Senderemailid and Sender name fields. You can freely type in these fields. You must specify a Reply-To address: this is the address replies will be sent to.
If second send mode is used, the Server name, port number and SSL/TLS authentication appears automatically. The user must fill the gmail id in Username field and password of gmail account in Password field.
After entering the gmail account details . click the Connection test button to make sure the SMTP server is reachable . Then the user has to specify the message sender in the Senderemailid and Sender name fields. You can freely type in these fields. You must specify a Reply-To address: this is the address replies will be sent to.
If the third option is selected, enter the name of the SMTP server in Server name.
Give the port where smtp service is offered (if it’s not specified, default port 25 will be used) in Port number. Specify Username and Password. Finally check the SSL /TLS checkbox if required, which may be needed by some SMTP servers . After entering the SMTP account details . click the Connection test button to make sure the SMTP server is reachable . Then the user has to specify the message sender in the Senderemailid and Sender name fields. You can freely type in these fields. You must specify a Reply-To address which is the address replies will be sent to.
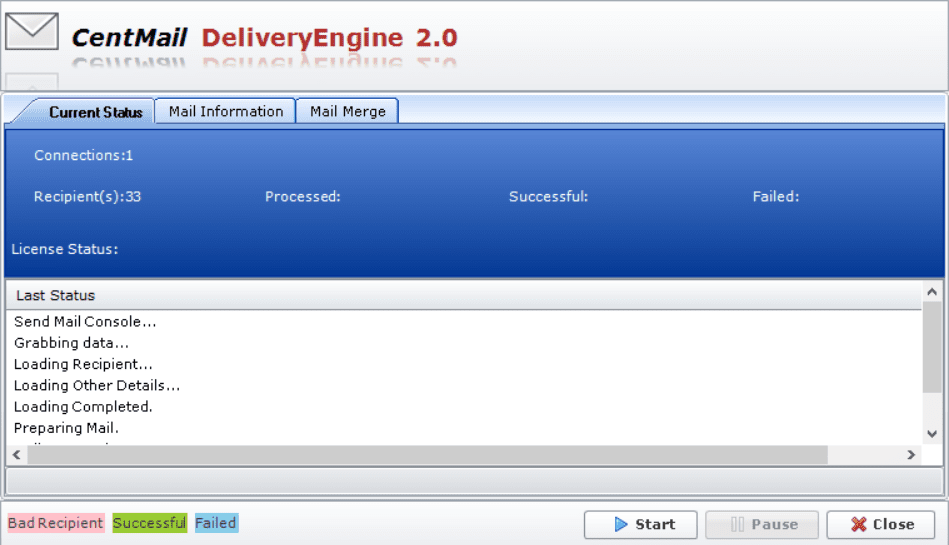
Now click on the FINISH button of the wizard to start sending the campaign. When FINISH is clicked, Send Mail Console appears .
Click Start to send the campaign. The current status tab in the send mail window shows the Total number of recipients in the chosen list, the number of recipients processed, number of recipients to whom email was successfully sent, number of recipients to whom email delivery failed. It also shows the latest status of the send operation.
The Mail information tab of send mail console shows the email specific details like tracking code, total recipients, Use ReplyTo, ReplyTo Email, Sender Email etc as shown below,
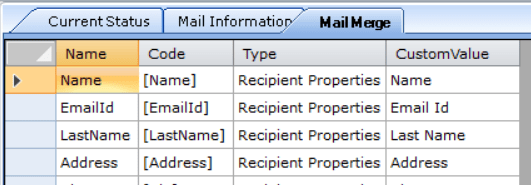
The Mail Merge tab specifies the available mail merge field details.
Click on the Pause button to pause the campaign sending. When the Pause button is clicked it, the mail sending pauses and the button text changes to Resume. So click on Resume to continue sending the campaign.
Click on the Close button to exit the Send mail console.